新系统的ubuntu基本配置
ubuntu 基本配置
开启ssh
为了操作方便,我更习惯开启ssh,在物理机的terminal操作ubuntu
安装openssh-server软件包
sudo apt update
sudo apt install openssh-server
验证ssh运行状态
sudo systemctl status ssh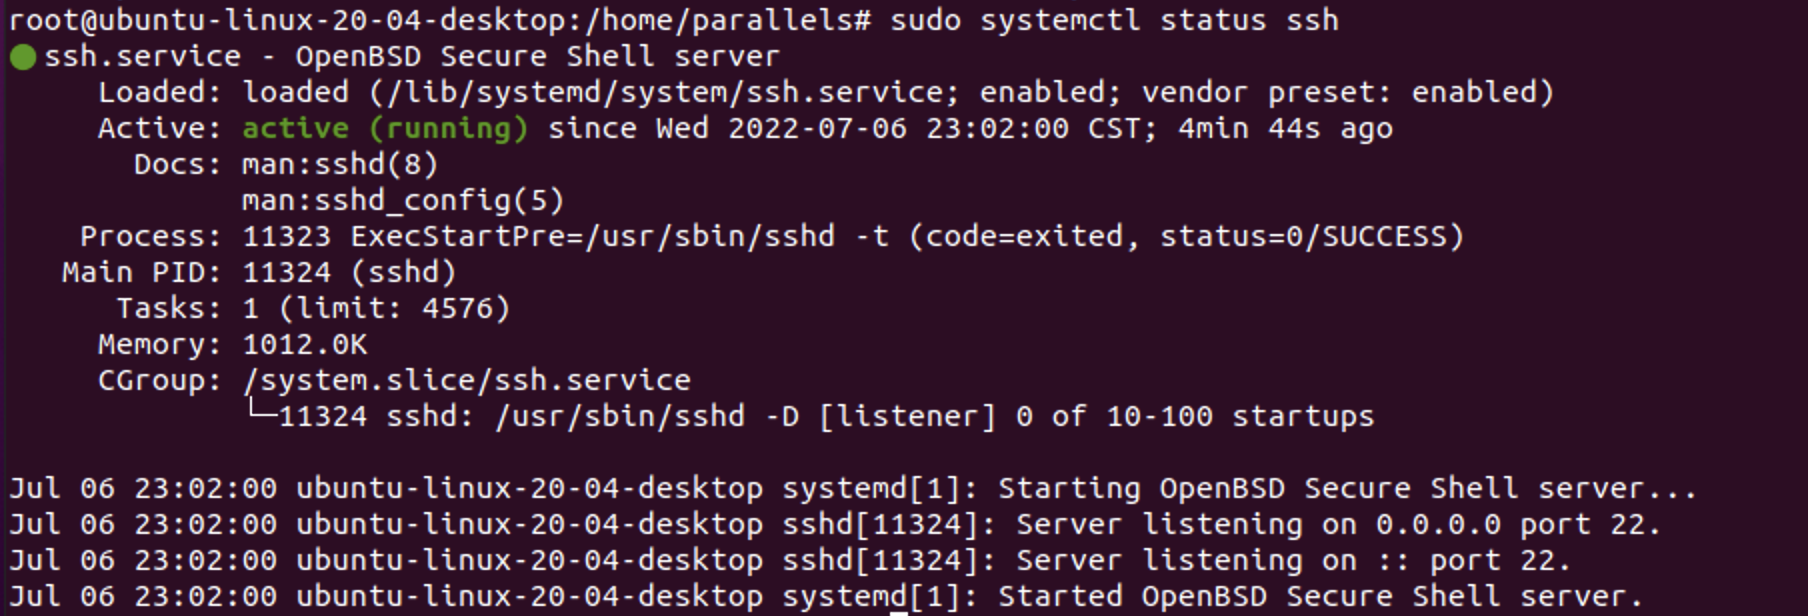
按q返回到命令行提示符
如果运行状态不为active(running),需要手动开启
/etc/init.d/ssh start
修改SSH登陆配置
sudo vim /etc/ssh/sshd_config将
PermitRootLogin prohibit-password那一行修改为PermitRootLogin yes,去掉前面的#号将port 22前面的#去掉
检查防火墙
Ubuntu随附了一个名为UFW的防火墙配置工具。如果在系统上启用了防火墙,请确保打开SSH端口。
sudo ufw allow ssh重启ssh服务
sudo systemctl disable --now sshsudo systemctl enable --now ssh
设置SSH连接时长
打开云服务器ssh配置文件:
vim /etc/ssh/sshd_config加入如下两个参数保存就可以:
TCPKeepAlive yes    # 保持TCP连接

ClientAliveInterval 600
ClientAliveCountMax 10
重启ssh服务
service sshd restart在客户端本地配置
在
~./ssh/config里添加# 断开时重试连接的次数 ServerAliveCountMax 5 # 每隔10秒自动发送一个空的请求以保持连接 ServerAliveInterval 10
配置vim可以中文显示
sudo vim /etc/vim/vimrc
在最下面添加代码
set fencs=utf-8,GB18030,ucs-bom,default,latin1
换源
sudo vim /etc/apt/sources.list
把本来的源注释掉,换成阿里源
deb http://mirrors.aliyun.com/ubuntu/ focal main restricted universe multiverse

deb http://mirrors.aliyun.com/ubuntu/ focal-security main restricted universe multiverse

deb http://mirrors.aliyun.com/ubuntu/ focal-updates main restricted universe multiverse

deb http://mirrors.aliyun.com/ubuntu/ focal-proposed main restricted universe multiverse

deb http://mirrors.aliyun.com/ubuntu/ focal-backports main restricted universe multiverse

deb-src http://mirrors.aliyun.com/ubuntu/ focal main restricted universe multiverse

deb-src http://mirrors.aliyun.com/ubuntu/ focal-security main restricted universe multiverse

deb-src http://mirrors.aliyun.com/ubuntu/ focal-updates main restricted universe multiverse

deb-src http://mirrors.aliyun.com/ubuntu/ focal-proposed main restricted universe multiverse

deb-src http://mirrors.aliyun.com/ubuntu/ focal-backports main restricted universe multiverse focal
arm64源
由于物理机是基于arm64架构的M1,所以相应的虚拟机也是arm64架构的ubuntu,换源时选用支持arm的源
中科大源(我更喜欢这个,不容易出问题,huawei源总有无法连接的网络问题)
 deb http://mirrors.ustc.edu.cn/ubuntu-ports/ bionic universe

 deb http://mirrors.ustc.edu.cn/ubuntu-ports/ bionic-updates universe

 deb http://mirrors.ustc.edu.cn/ubuntu-ports/ bionic multiverse

 deb http://mirrors.ustc.edu.cn/ubuntu-ports/ bionic-updates multiverse

 deb http://mirrors.ustc.edu.cn/ubuntu-ports/ bionic-backports main restricted universe multiverse

 deb http://mirrors.ustc.edu.cn/ubuntu-ports/ bionic-security main restricted

 deb http://mirrors.ustc.edu.cn/ubuntu-ports/ bionic-security universe

 deb http://mirrors.ustc.edu.cn/ubuntu-ports/ bionic-security multiverse
Huawei 源
wget -O /etc/apt/sources.list https://repo.huaweicloud.com/repository/conf/Ubuntu-Ports-bionic.list
更新软件
更新系统软件源
sudo apt-get update && sudo apt-get dist-upgrade -y
网络状况不好时会导致下载文件hash认证失败,可以使用sudo apt-get clean,这将清除/var/lib/apt/lists/*,然后在 sudo apt-get update进行更新
更正时间
sudo dpkg-reconfigure tzdata
装oh-my-zsh
zsh是装到指定的用户下面的。如果安装zsh时是用的普通用户,那就是以普通用户身份运行的时候有zsh,切换到root就没有。
所以切换用户的时候,要给那个用户重新安装
安装git
sudo apt-add-repository ppa:git-core/ppa
sudo apt-get update
sudo apt-get install git
查看系统当前shell
echo $SHELL
查看系统自带哪些shell
cat /etc/shells
安装zsh
sudo apt install zsh -y
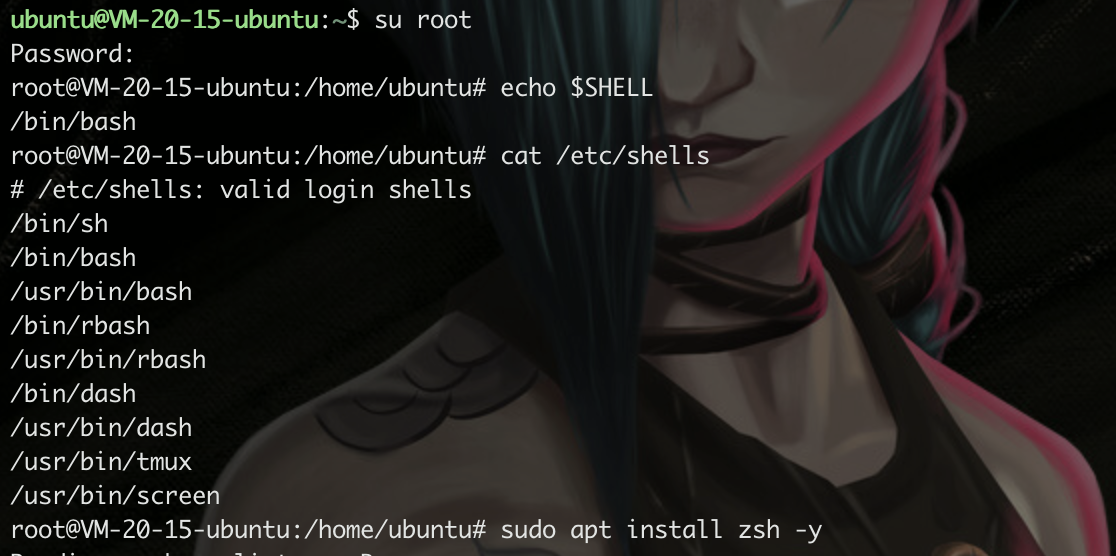
安装之后 使用 cat /etc/shells 查看系统的shell有 /usr/bin/zsh说明安装成功。
设置zsh为默认shell
chsh -s /bin/zsh
然后重启
sudo reboot
需要给不同用户安装zsh时,从这一步开始。字体可以不用再下载一次,(字体这一步可以不再来一次)
安装oh-my-zsh【不能通过ssh执行】
sh -c "$(curl -fsSL https://raw.github.com/robbyrussell/oh-my-zsh/master/tools/install.sh)"

安装curl时出现报错
The following packages have unmet dependencies:
 curl : Depends: libcurl4 (= 7.58.0-2ubuntu3.19) but 7.68.0-1ubuntu2.7 is to be installed
E: Unable to correct problems, you have held broken packages.
解决方案
sudo apt-get purge libcurl4
sudo apt-get install curl
Curl安装成功
配置文件
vi ~/.zshrc
修改主题
修改这一行ZSH_THEME="robbyrussell"将主题修改为自己喜欢的
ZSH_THEME="agnoster"
重新加载配置文件
source ~/.zshrc
字体乱码问题
下载最新版本的符号字体和字体配置文件
wget https://github.com/powerline/powerline/raw/develop/font/PowerlineSymbols.otf

wget https://github.com/powerline/powerline/raw/develop/font/10-powerline-symbols.conf
将符号字体移动到一个可用的字体路径
mv PowerlineSymbols.otf ~/.local/share/fonts/
更新字体移动到路径的字体缓存
fc-cache -vf ~/.local/share/fonts/
安装字体配置文件
mv 10-powerline-symbols.conf ~/.config/fontconfig/conf.d/
重启
reboot
下载插件
自动提示
git clone https://github.com/zsh-users/zsh-autosuggestions ~/.oh-my-zsh/custom/plugins/zsh-autosuggestions
语法高亮
sudo apt install zsh-syntax-highlighting
echo "source /usr/share/zsh-syntax-highlighting/zsh-syntax-highlighting.zsh" >> ~/.zshrc
修改配置文件,生效插件
vim ~/.zshrc
找到插件位置,添加刚刚的插件

source ~/.zshrc
PS:如果重新打开终端看不到自动提示,可能是终端的字体颜色太淡了,可以通过👇配置把字体改亮一些:
cd ~/.oh-my-zsh/custom/plugins/zsh-autosuggestions
修改自动提示相关的配置文件:ZSH_AUTOSUGGEST_HIGHLIGHT_STYLE='fg=10'
vi zsh-autosuggestions.zsh
source ~/.zshrc
*Ubuntu 快速开启 TCP BBR 实现高效单边加速【非必需】
Linux Kernel 内核升级到 4.9 及以上版本可以实现 BBR 加速,由于Ubuntu 18.04 默认的内核就是 4.15版本的内核。
由于Ubuntu 20.04 默认的内核就是 5.4 版本的内核,并已经默认编译了 TCP BBR 模块,所以可以直接通过参数开启。新的 TCP 拥塞控制算法 BBR (Bottleneck Bandwidth and RTT) 可以让服务器的带宽尽量跑慢。并且尽量不要有排队的情况,让网络服务更佳稳定和高效。
修改系统变量:
echo net.core.default_qdisc=fq >> /etc/sysctl.conf
echo net.ipv4.tcp_congestion_control=bbr >> /etc/sysctl.conf
保存生效
sysctl -p
执行
sysctl net.ipv4.tcp_available_congestion_control
如果结果是这样
sysctl net.ipv4.tcp_available_congestion_control
net.ipv4.tcp_available_congestion_control = bbr cubic reno
就开启了。执行 lsmod | grep bbr ,以检测 BBR 是否开启。
安装python
sudo apt-get update
sudo add-apt-repository ppa:deadsnakes/ppa
sudo apt-get install python3.8
# 查看版本
python3.8 --version
安装pip
sudo apt install python3-pip
修改系统默认版本为python3.8
删除默认的Python3软链接:
sudo rm /usr/bin/python3
然后创建一个新的软链接指向需要的Python3版本:
sudo ln -s /usr/bin/python3.8 /usr/bin/python3