centOS-Stream9ARM基础配置
一个细节发现
源里面经常会有这种变量:
https://mirrors.aliyun.com/centos-stream/$stream/AppStream/$basearch/os/
$basearch 的值,系统硬件架构(CPU指令集)
架构是aarch64
$stream 的值,就是系统版本了
版本是CentOS Stream release 9

地址代入该系统变量后的路径就是
https://mirrors.aliyun.com/centos-stream/9-stream/AppStream/aarch64/os/
打开ssh
sudo vim /etc/ssh/sshd_config
将
PermitRootLogin prohibit-password那一行修改为PermitRootLogin yes,去掉前面的#号将port 22前面的#去掉
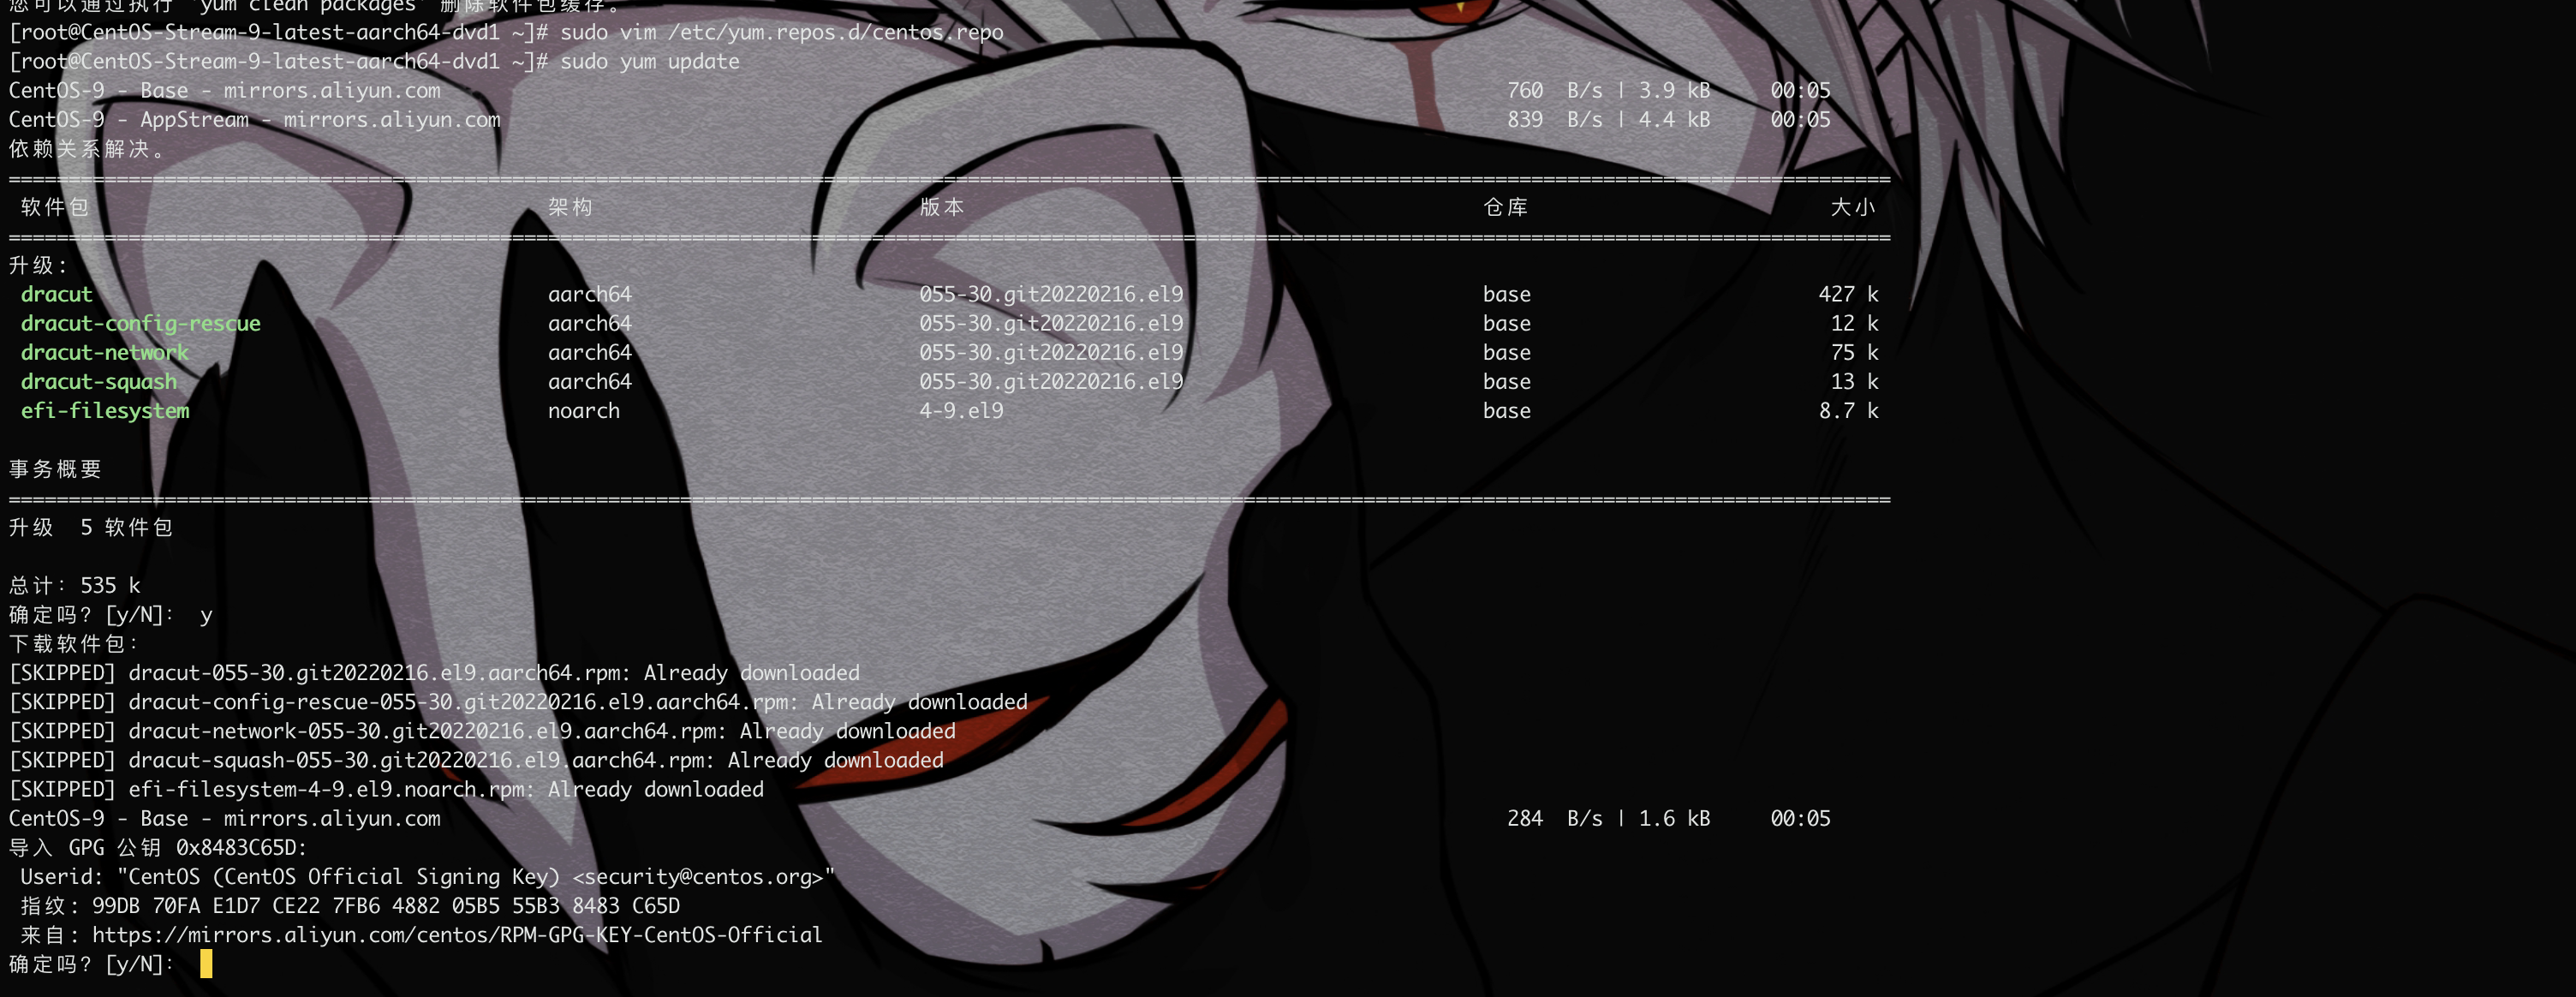
更换源
备份
sudo mv /etc/yum.repos.d/centos.repo /etc/yum.repos.d/centos.repo.backup
换成阿里源
sudo vi /etc/yum.repos.d/centos.repo
# CentOS-Base.repo
#
# The mirror system uses the connecting IP address of the client and the
# update status of each mirror to pick mirrors that are updated to and
# geographically close to the client.  You should use this for CentOS updates
# unless you are manually picking other mirrors.
#
# If the mirrorlist= does not work for you, as a fall back you can try the
# remarked out baseurl= line instead.
#
#

[base]
name=CentOS-$releasever - Base - mirrors.aliyun.com
#failovermethod=priority
baseurl=https://mirrors.aliyun.com/centos-stream/$stream/BaseOS/$basearch/os/
        http://mirrors.aliyuncs.com/centos-stream/$stream/BaseOS/$basearch/os/
        http://mirrors.cloud.aliyuncs.com/centos-stream/$stream/BaseOS/$basearch/os/
gpgcheck=1
gpgkey=https://mirrors.aliyun.com/centos/RPM-GPG-KEY-CentOS-Official

#additional packages that may be useful
#[extras]
#name=CentOS-$releasever - Extras - mirrors.aliyun.com
#failovermethod=priority
#baseurl=https://mirrors.aliyun.com/centos-stream/$stream/extras/$basearch/os/
#        http://mirrors.aliyuncs.com/centos-stream/$stream/extras/$basearch/os/
#        http://mirrors.cloud.aliyuncs.com/centos-stream/$stream/extras/$basearch/os/
#gpgcheck=1
#gpgkey=https://mirrors.aliyun.com/centos/RPM-GPG-KEY-CentOS-Official

#additional packages that extend functionality of existing packages
[centosplus]
name=CentOS-$releasever - Plus - mirrors.aliyun.com
#failovermethod=priority
baseurl=https://mirrors.aliyun.com/centos-stream/$stream/centosplus/$basearch/os/
        http://mirrors.aliyuncs.com/centos-stream/$stream/centosplus/$basearch/os/
        http://mirrors.cloud.aliyuncs.com/centos-stream/$stream/centosplus/$basearch/os/
gpgcheck=1
enabled=0
gpgkey=https://mirrors.aliyun.com/centos/RPM-GPG-KEY-CentOS-Official

[PowerTools]
name=CentOS-$releasever - PowerTools - mirrors.aliyun.com
failovermethod=priority
baseurl=https://mirrors.aliyun.com/centos-stream/$stream/PowerTools/$basearch/os/
        http://mirrors.aliyuncs.com/centos-stream/$stream/PowerTools/$basearch/os/
        http://mirrors.cloud.aliyuncs.com/centos-stream/$stream/PowerTools/$basearch/os/
gpgcheck=1
enabled=0
gpgkey=https://mirrors.aliyun.com/centos/RPM-GPG-KEY-CentOS-Official


[AppStream]
name=CentOS-$releasever - AppStream - mirrors.aliyun.com
#failovermethod=priority
baseurl=https://mirrors.aliyun.com/centos-stream/$stream/AppStream/$basearch/os/
        http://mirrors.aliyuncs.com/centos-stream/$stream/AppStream/$basearch/os/
        http://mirrors.cloud.aliyuncs.com/centos-stream/$stream/AppStream/$basearch/os/
gpgcheck=1
gpgkey=https://mirrors.aliyun.com/centos/RPM-GPG-KEY-CentOS-Official
yum clean all
yum makecache
sudo yum update
如果想使用dnf的话,使dnf的源也更新
sudo dnf makecache

添加CRB仓库
vim /etc/yum.repos.d/centos.repo
最后一行加入
[crb]
name = =CentOS-$releasever - CRB - mirrors.aliyun.com
#failovermethod=priority
baseurl=https://mirrors.aliyun.com/centos-stream/$stream/CRB/$basearch/os/
     http://mirrors.aliyuncs.com/centos-stream/$stream/CRB/$basearch/os/
     http://mirrors.cloud.aliyuncs.com/centos-stream/$stream/CRB/$basearch/os/
gpgcheck=1
gpgkey=https://mirrors.aliyun.com/centos/RPM-GPG-KEY-CentOS-Official
dnf makecache
yum makecache
用crb下载
dnf --enablerepo=crb install <包名> -y
可以通过https://pkgs.org/来查看要下载的包,是属于哪个仓库源的
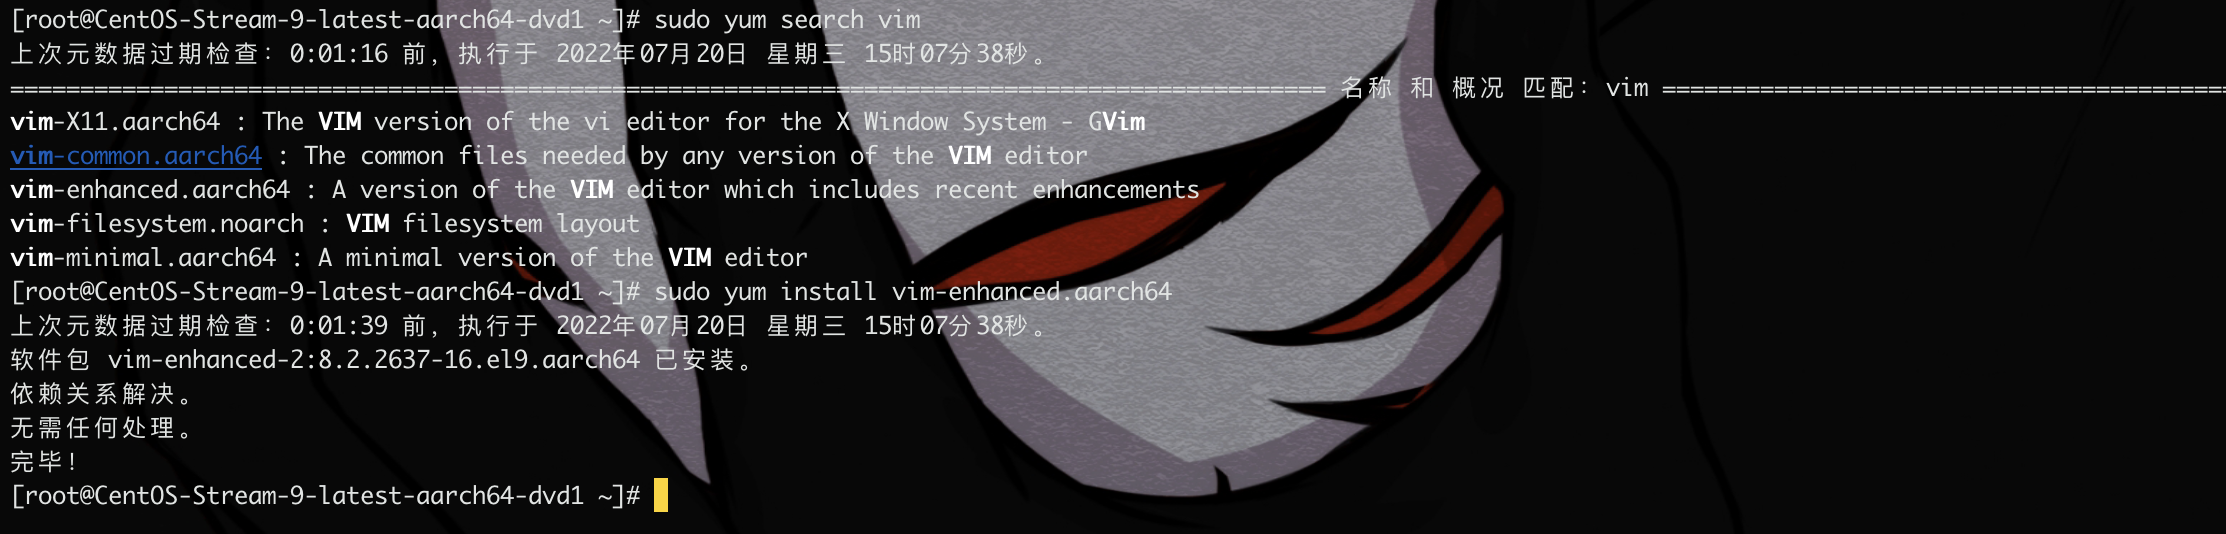
安装vim
sudo yum search vim
sudo yum install vim-enhanced.aarch64
安装oh-my-zsh
安装git
sudo yum search git
sudo yum install git.aarch64
安装zsh
sudo yum install zsh
更改默认shell
chsh -s /usr/bin/zsh
github 443拒绝访问
sudo vim /etc/hosts
加入
192.30.255.113 github.com
就可以ping通了
安装oh-my-zsh(不能用ssh)
sh -c "$(curl -fsSL https://raw.github.com/robbyrussell/oh-my-zsh/master/tools/install.sh)"
网不好的情况下,就把脚本内容复制过来,在里面装
vim install.sh
chmod +x install.sh
sudo ./install.sh
配置文件
vim ~/.zshrc
修改主题
修改这一行ZSH_THEME="robbyrussell"将主题修改为自己喜欢的
ZSH_THEME="agnoster"
重新加载配置文件
source ~/.zshrc
下载插件
自动提示
git clone https://github.com/zsh-users/zsh-autosuggestions ~/.oh-my-zsh/custom/plugins/zsh-autosuggestions
语法高亮
git clone https://github.com/zsh-users/zsh-syntax-highlighting ~/.oh-my-zsh/custom/plugins/zsh-syntax-highlighting
echo "source ~/.oh-my-zsh/custom/plugins/zsh-syntax-highlighting/zsh-syntax-highlighting.zsh" >> ~/.zshrc
修改配置文件,生效插件
vim ~/.zshrc
找到插件位置,添加刚刚的插件

source ~/.zshrc
改自动提示颜色、亮度
PS:如果重新打开终端看不到自动提示,可能是终端的字体颜色太淡了,可以通过👇配置把字体改亮一些:
cd ~/.oh-my-zsh/custom/plugins/zsh-autosuggestions
修改自动提示相关的配置文件:ZSH_AUTOSUGGEST_HIGHLIGHT_STYLE='fg=10'
vi zsh-autosuggestions.zsh
source ~/.zshrc
修改主题目录颜色
sudo vim ~/.oh-my-zsh/themes/agnoster.zsh-theme